

This how-to is designed for scientists wishing to capture digital images where color accuracy is critical. For example, in quantifying differences in flower petal color for plant variety protection. It is largely based on protocols established by photographers in the field of cultural heritage imaging, where the mission is accurate digital preservation of often priceless objects.
A Guide to Accurate & Reproducible Color
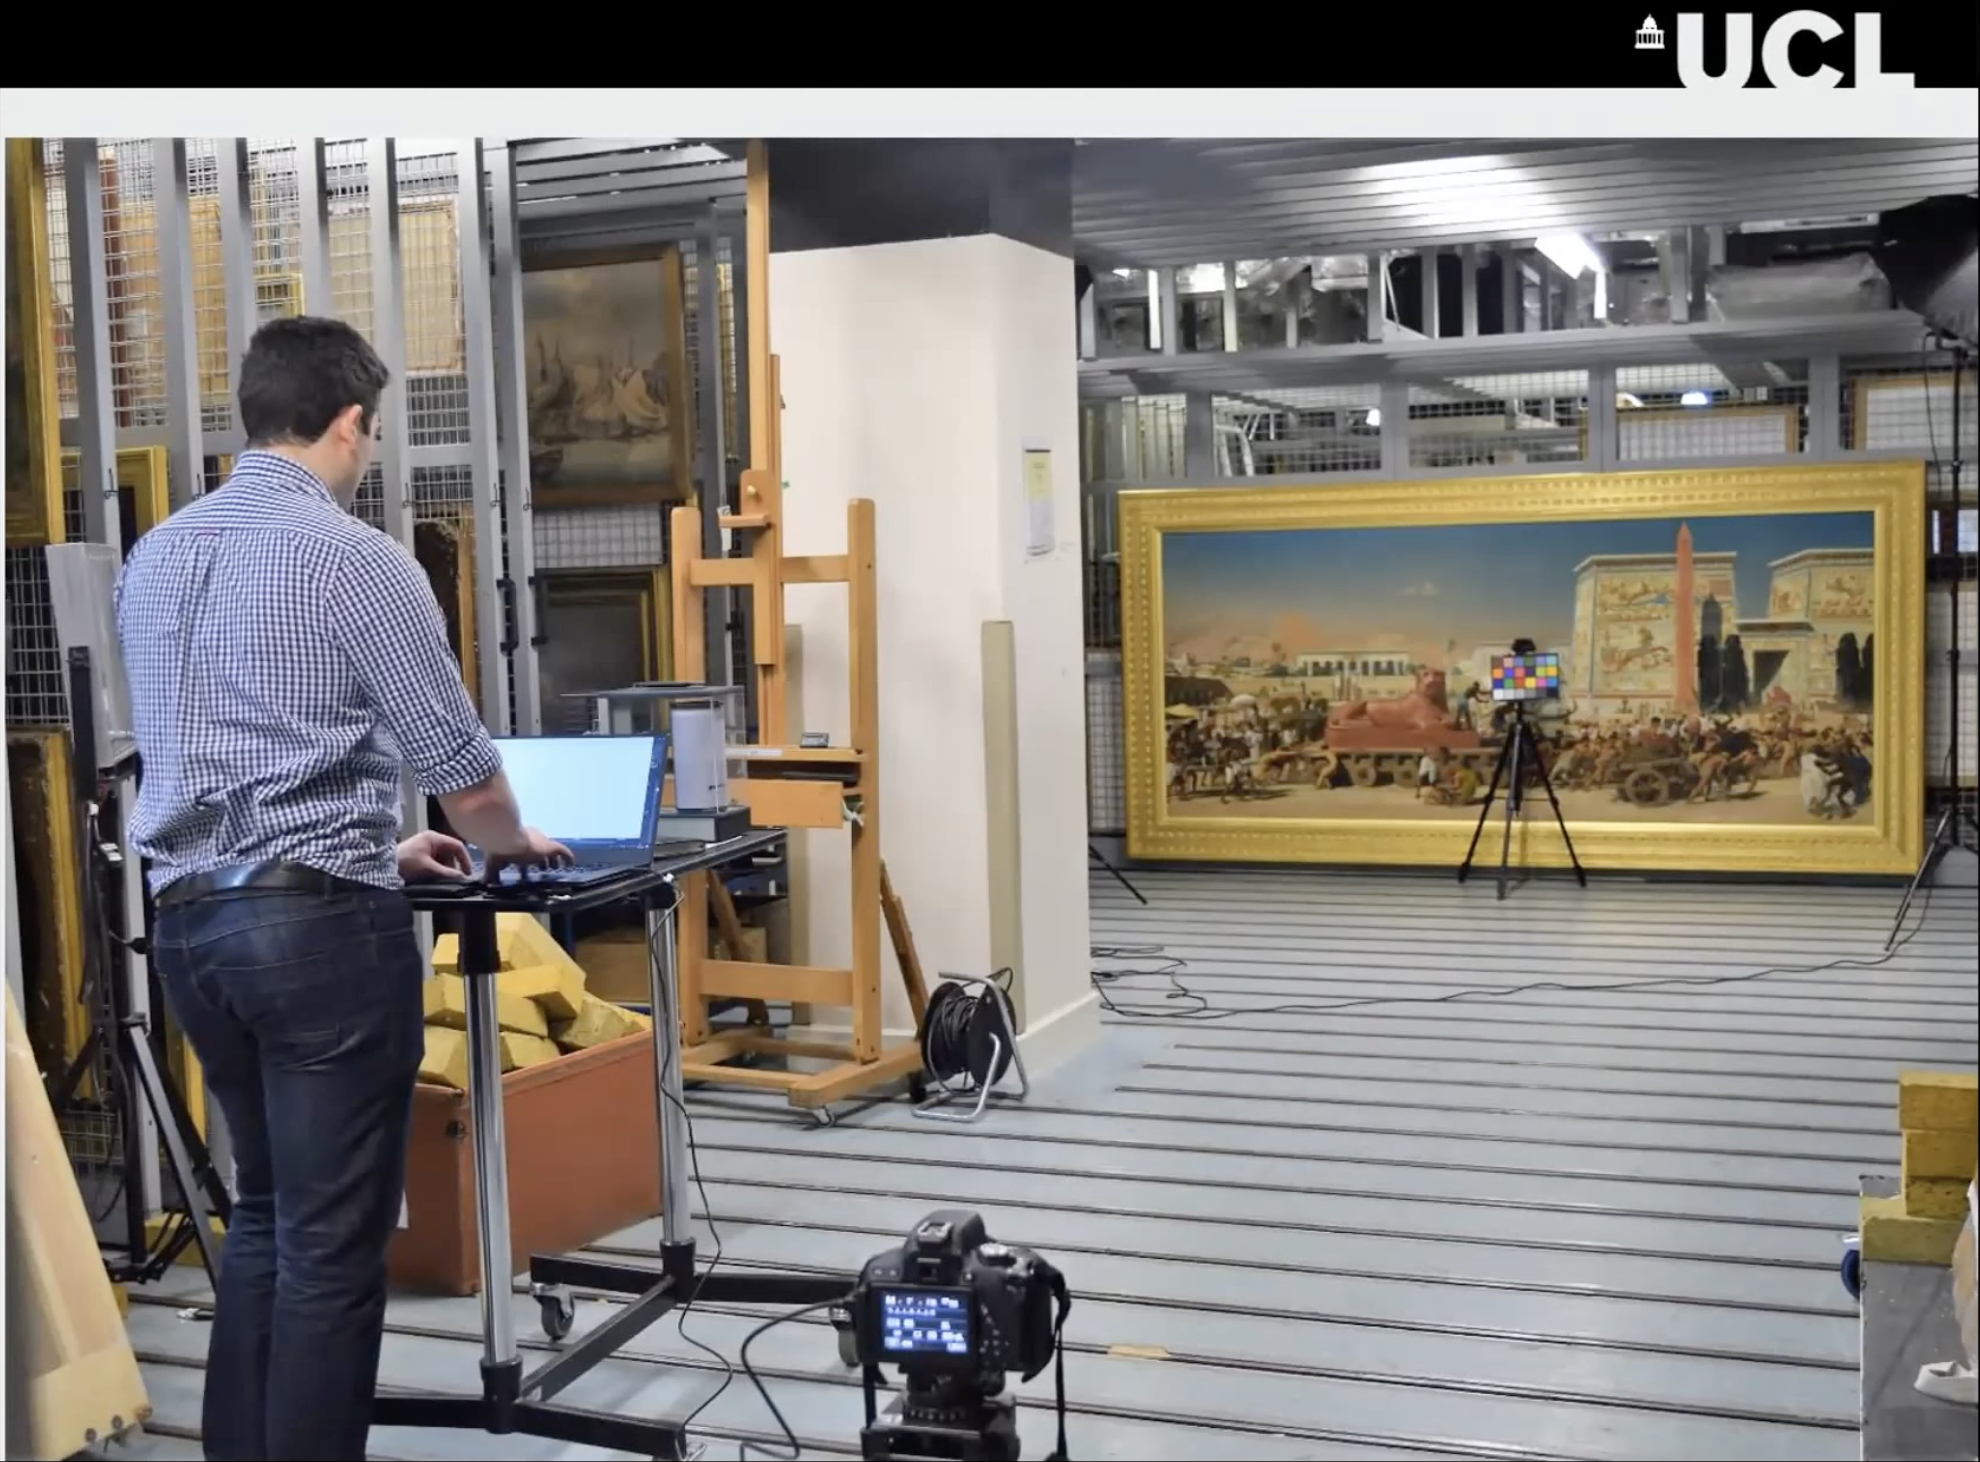
Imaging Equipment & Supplies
Must haves
-
An interchangeable lens camera, such as a dSLR or mirrorless
-
A sturdy mount for overhead/flat lay imaging, such as a copystand
-
Diffused LED lighting with a Color Rendering Index > 90
-
A neutral (grayscale), matte, background
-
A color-calibration target (more below)
A note about LEDs
Although LED has become the standard for photographic lighting, it has some well-documented limitations. For one, compared to incandescent sources, LED spectral output is often deficient in some wavebands, red in particular; this will impact color rendering negatively. An LED with a high CRI can still be red-deficient. For best results, select LEDs with a high CRI R9 link: what is cri r9 and why is it important.
Convenient Accessories
-
Camera AC adapter for continuous power
-
A laptop running software such as Canon EOS Utility or Adobe Lightroom Classic for tethered shooting via USB
-
A USB cable for connecting camera to computer
-
A bubble level to ensure that the camera is level with respect to the background (this prevents perspective distortion which can skew physical measurements)
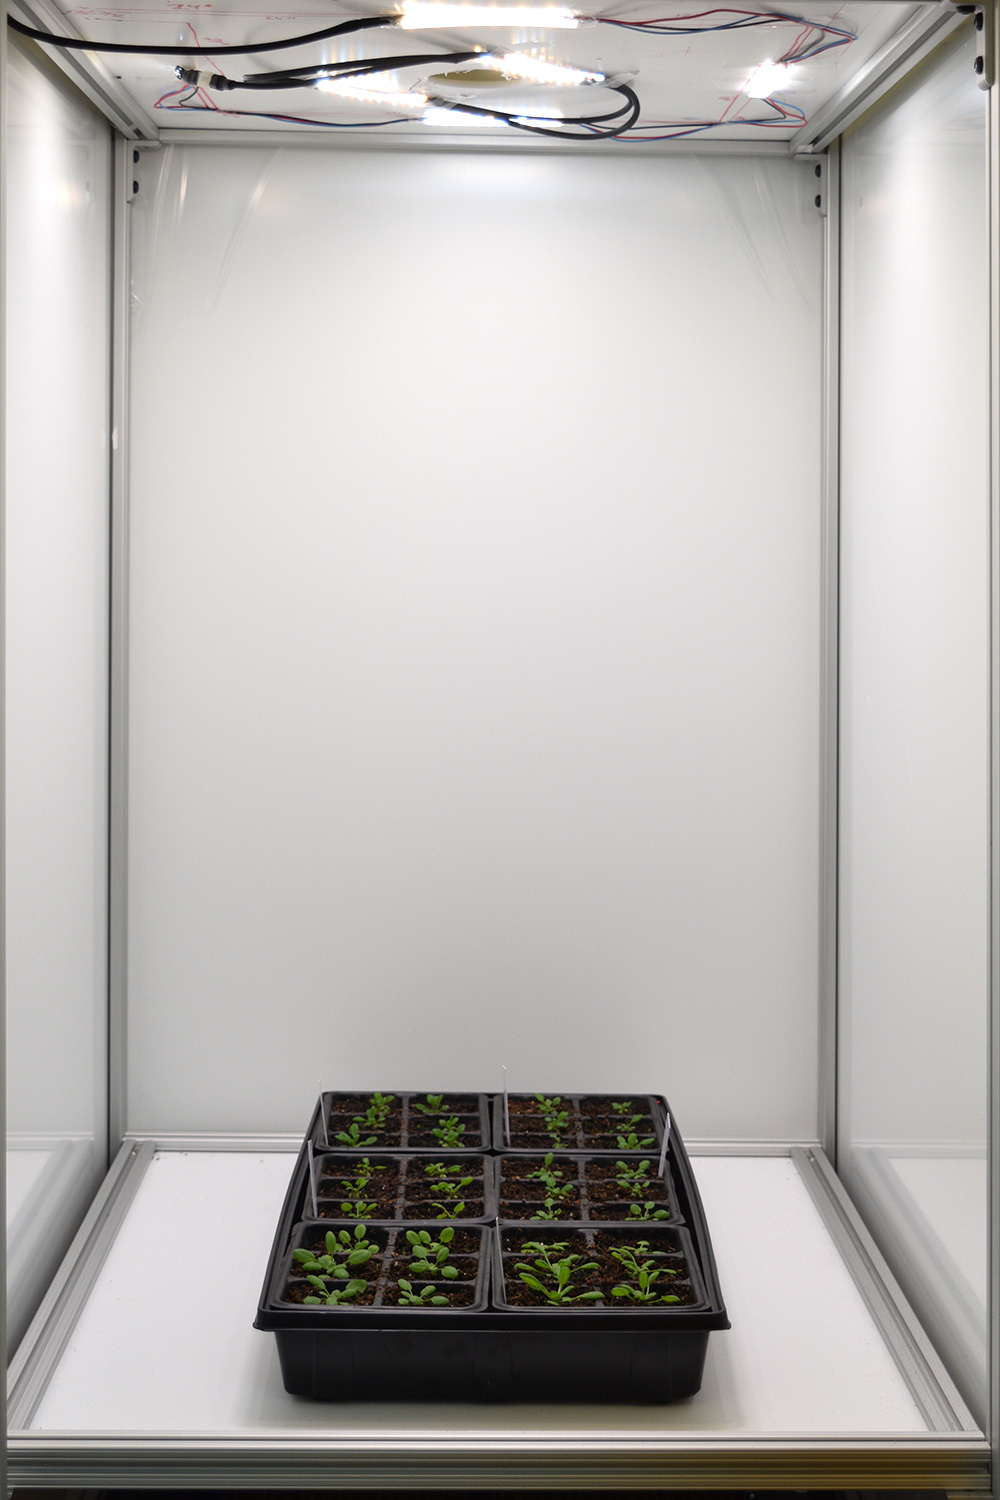
LED
White interior because it helps reflect the LED light and prevent shadows.
Focus point for image capture is centered under the lights.
Door (not pictured) reflects the light while also blocking any external illumination
Camera insert. Though the camera is not pictured, you can see the hole in the top of the box where the camera is mounted with the cutout for the lens.
What elements are needed to custom build a imaging booth for really accurate photos? Learn more by exploring this example of a custom built photo box.
Image Setting Parameters
Online Tool Options
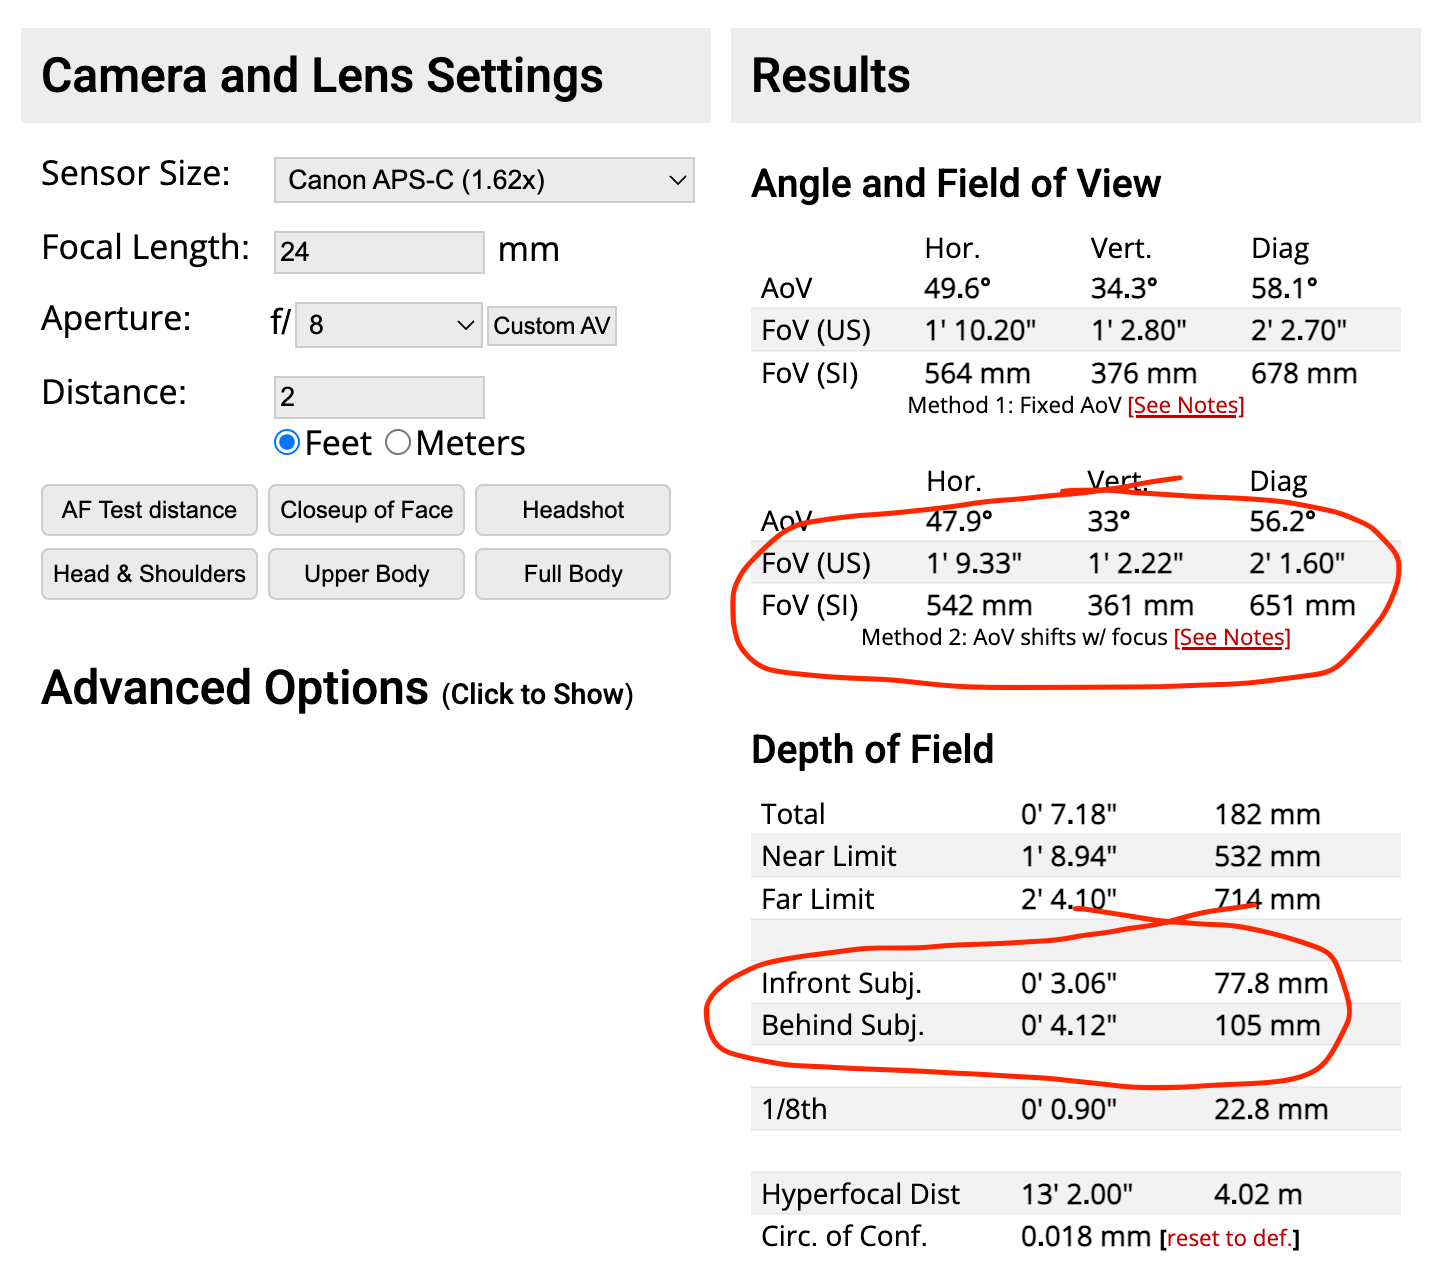
In order for the subject, e.g., a tray of fruits, a flowering stem, to fit fully into the frame and be in focus it is helpful to do some calculations in advance. There are several online tools that make this convenient with only a few user inputs:
-
Sensor size: Most likely you will have a “crop sensor”, slightly smaller than full frame. For Canon the crop factor is 1.62x and for Nikon it is 1.53x.
-
Focal length: Printed on the lens or zoom ring, it determines angle of view and magnification.
-
Aperture: Controls the amount of light reaching the sensor, expressed as an f-number. A lower f-number corresponds to a more dialated aperture, letting in more light but at the expense of depth of field (distance between the nearest and farthest objects in a scene that appear acceptably sharp in an image). Most variable aperture lenses are sharpest in the middle of their range, around f-8 to f-11.
-
Working distance: the physical space between the front of the lens and the subject. A greater working distance increases field of view and depth of field, while lowering resolution
Zoom settings
If using a zoom lens, set the zoom so that your subject, such as a plant tray, completely falls within the frame, while leaving some extra space to account for light fall-off (vignetting)
For reproducibility, set the zoom level to one of the focal lengths embossed on the lens barrel, typically 18 mm, 24 mm, 36 mm, 55 mm
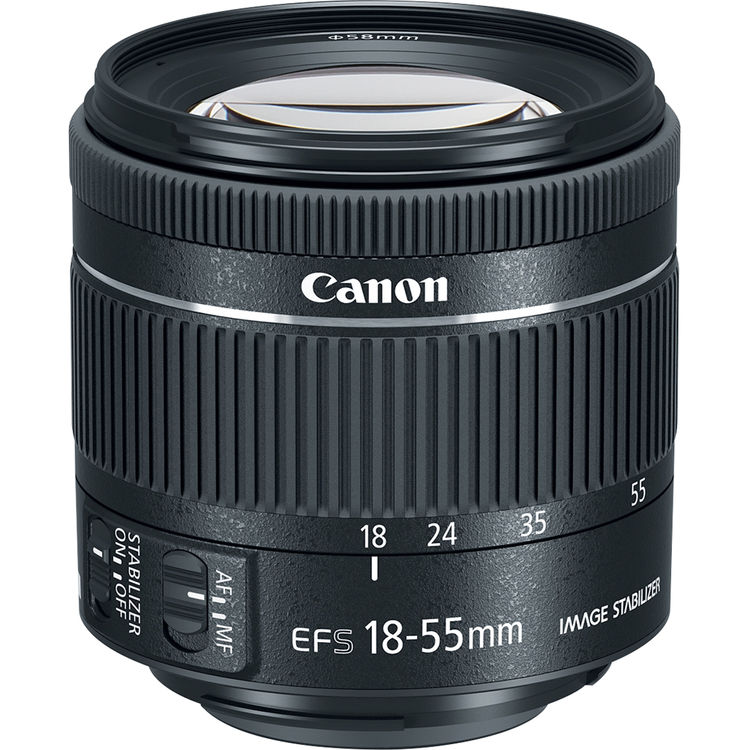
Use one of the zoom levels indicated on the barrel for repeatability (18 mm focal length is indicated here). Also switch from auto-focus ‘AF’ to manual ‘M’ with the switch. Enable lens stabilization if available.
For example, a standard 1020 (10 in x 20 in) horticultural flat placed two feet from the lens should fit fully in the frame of a Canon APS-C camera zoomed to 24 mm – but just barely. There will be three inches of focus depth above the surface, sufficient for seedlings, for example.
It isn’t necessary to have the latest camera technology. For example, the author uses a 2017 Canon EOS Rebel SL2 with 18-55 mm kit lens. With their larger sensors and ability to collect light with optics designed for photography rather than compromised to fit a smartphone, they offer high image quality and the ability to manually control settings for reproducible outputs.
Source: Points in Focus
Shooting Environment
Open Systems
For flat objects such as paintings and documents, so-called “normal lighting” is most common. In this arrangement, the camera is positioned directly overhead, and two lights are positioned at a 45-degree angle on either side of the subject, at the same distance.
Note that open systems facilitate sample handling since there are no doors to open and close, but they must be used in a room that is either darkened or very dimly lit.
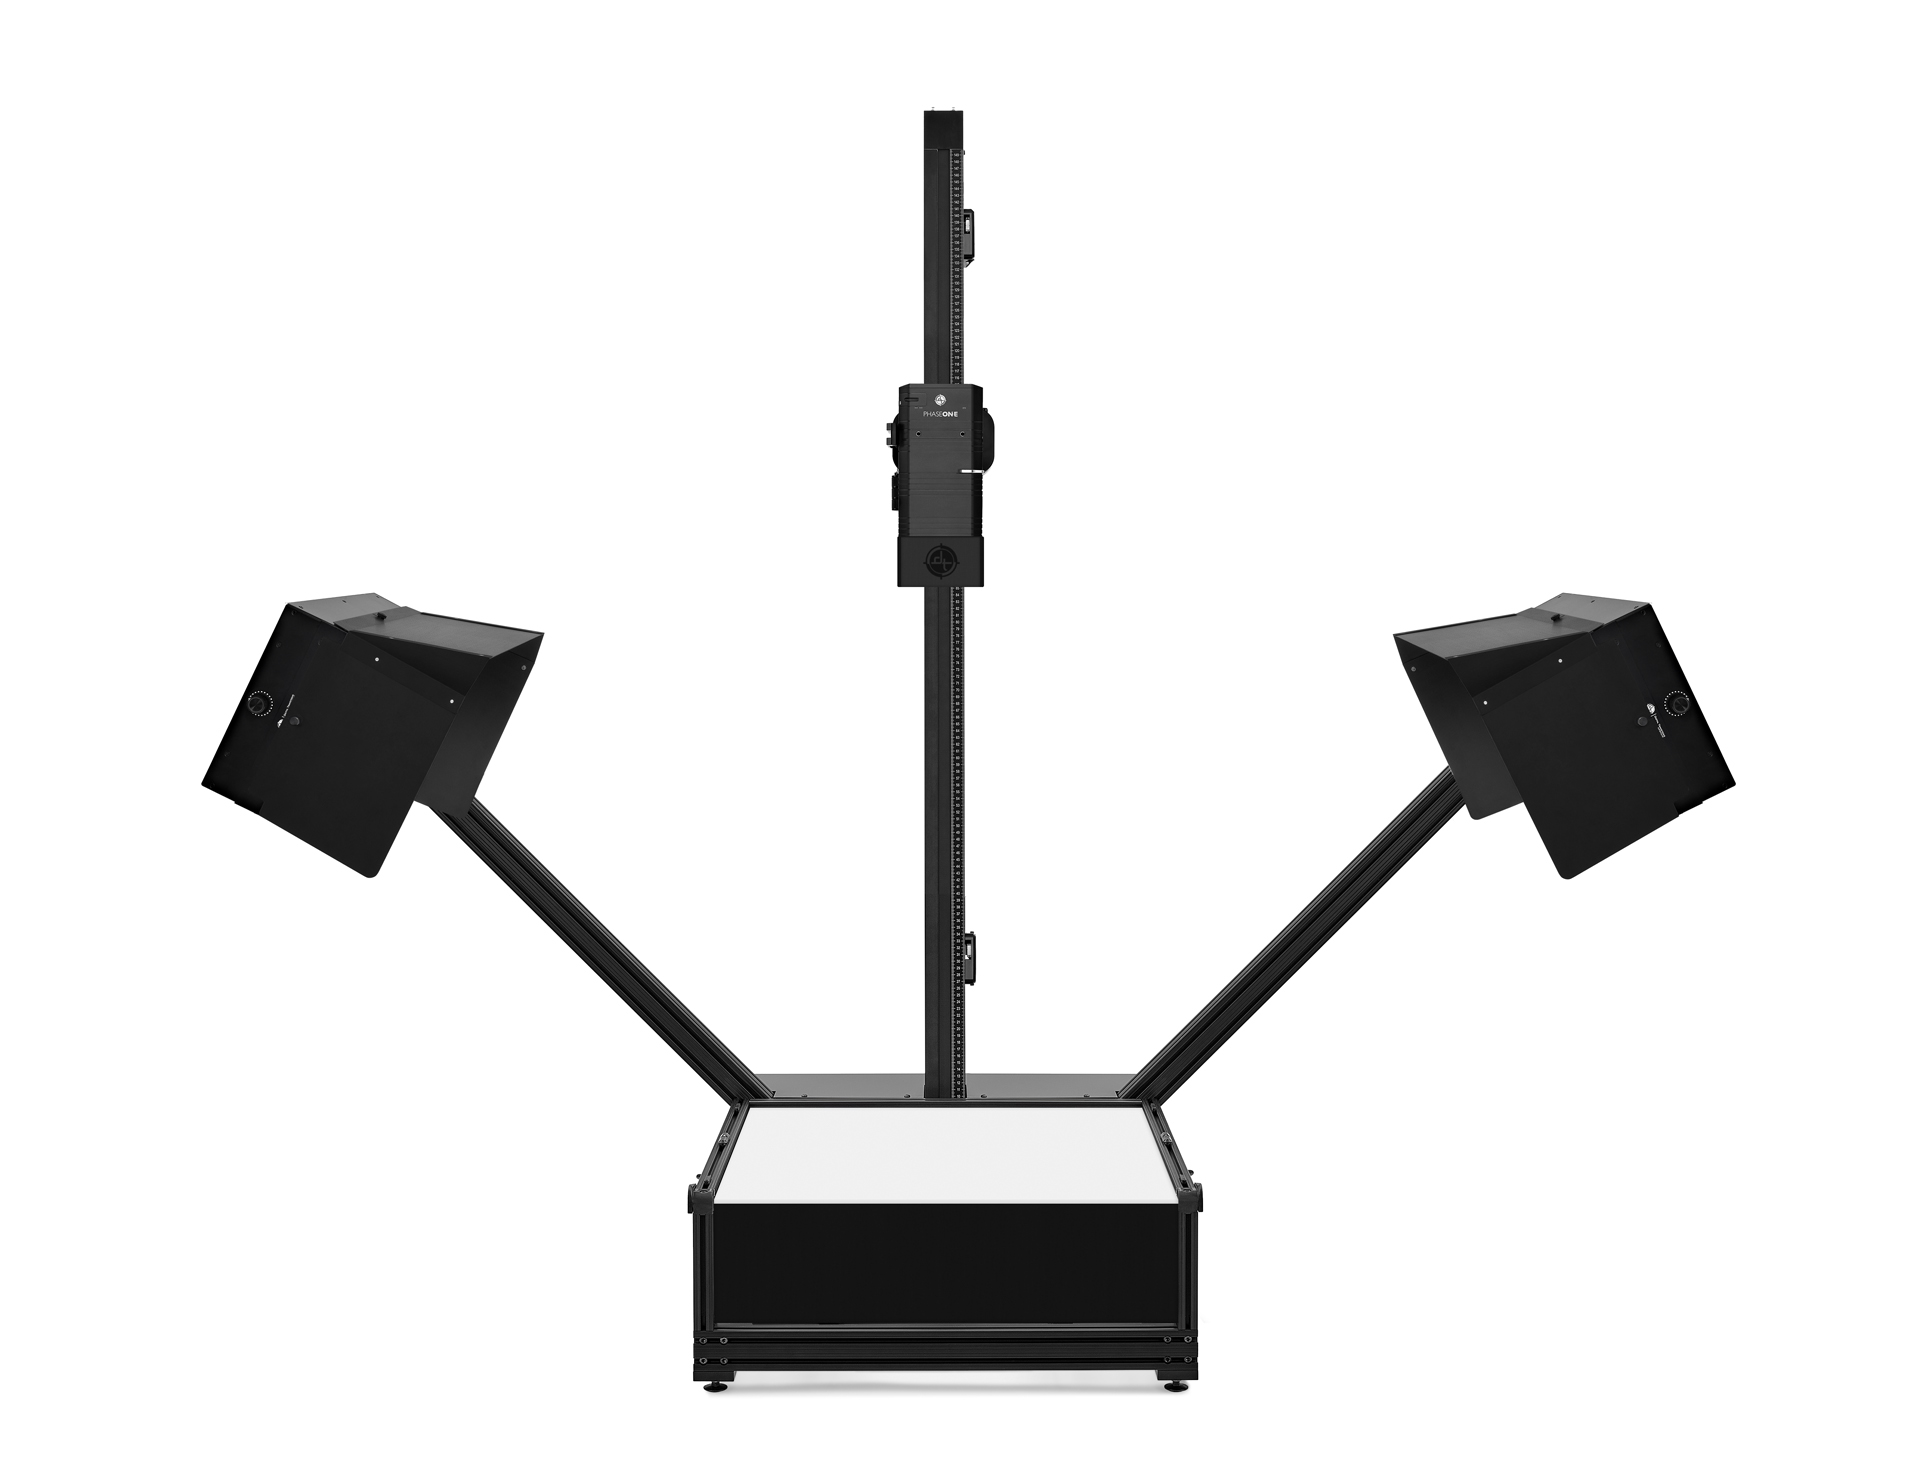
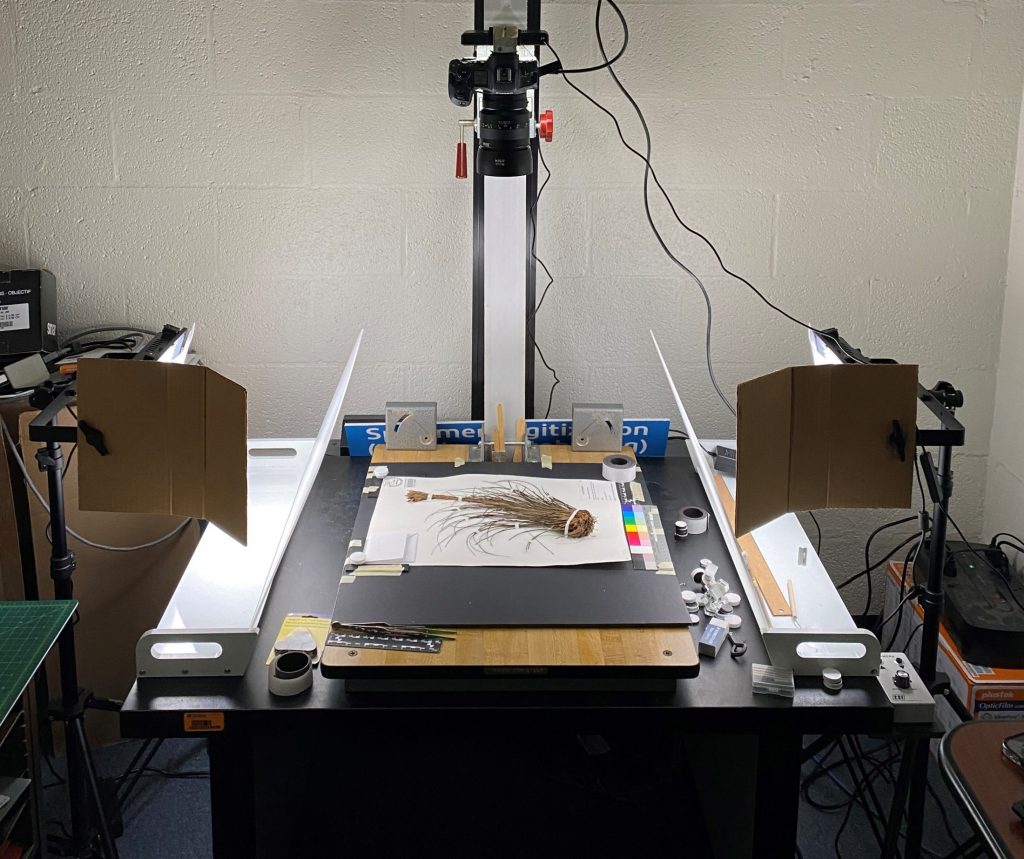
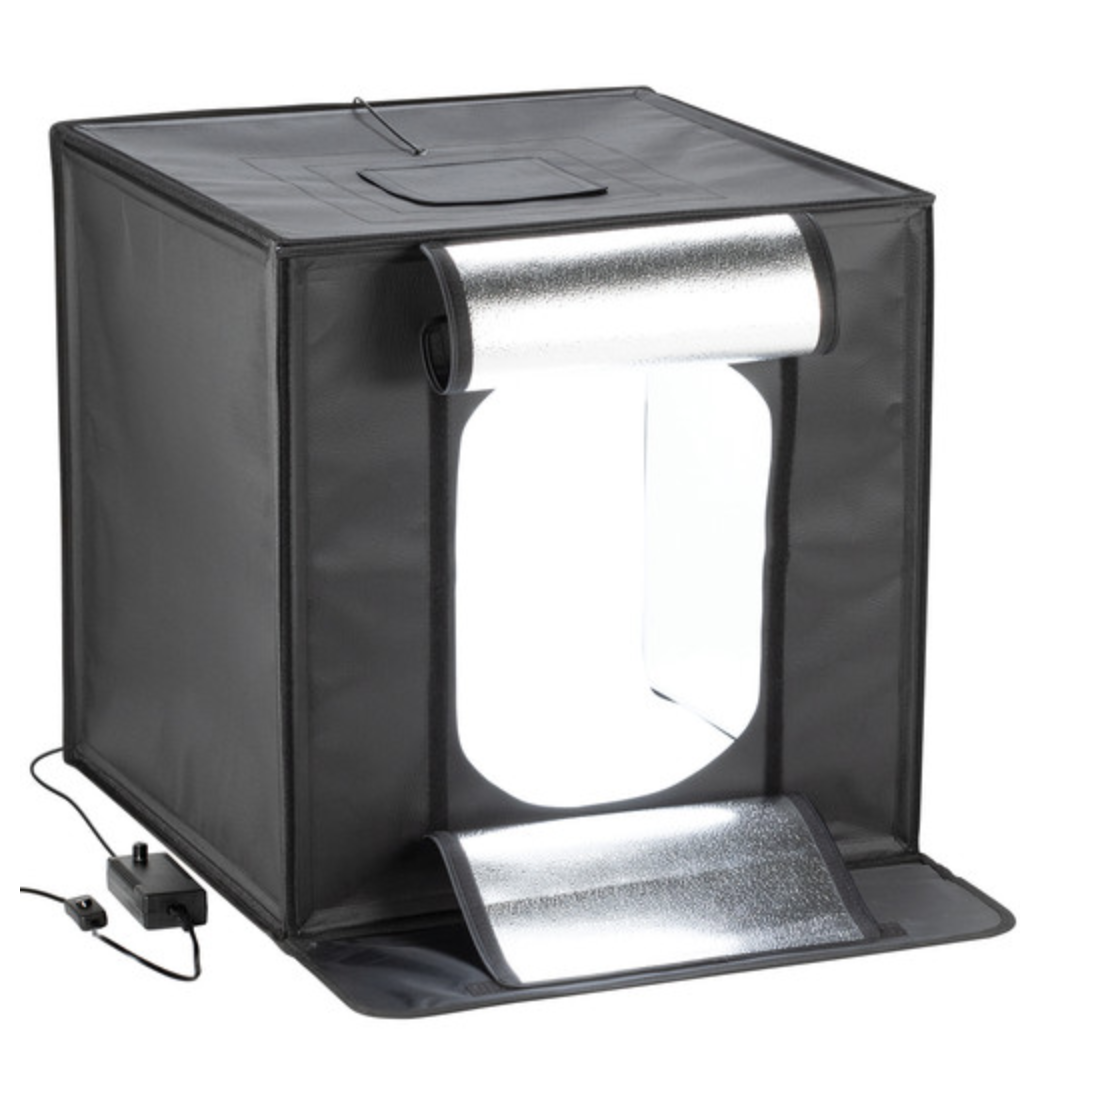
Note the differences in the setup of each system.
List Pros/Cons
(might need a different box image)
Setting Exposure
Settings
-
Turn on the lighting
-
If brightness is selectable: choose either the brightest or dimmest level for better reproducibility
-
If LEDs are “bi-color”: choose a CCT around 5000 Kelvin (daylight)
-
-
Select the Program (P) mode on the camera dial
-
Place a neutral, grayscale object on the background and set the in-camera white balance. Refer to your camera manual for model-specific instructions:
-
A white balance target may be included with your ColorChecker, e.g. ColorChecker Passport 2
-
Spectrally neutral white balance targets are commercially available
-
If you are certain that your background is spectrally neutral then it can be used
-
Once you are confident that the white balance is set correctly, you can find the color temperature in Kelvin from the EXIF data of an image file and enter it for all future images shot with the scene (combination of camera/lens, lighting, and environment)
-

Setting up White Balance
Getting the white balance correct before imaging your samples is critical when shooting directly to JPEG. This is because an incorrect color cast will be applied to all pixels during processing and saving. Although white balance can be adjusted later, it cannot technically be corrected, due to baked-in image processing and the lossy nature of the compression algorithm.
RAW images by definition are unprocessed data from the imaging sensor. They are not white balanced – nor have they been subjected to other imaging processing steps such as color saturation adjustment and sharpening. The image preview that you see may appear to have a color cast, but this is only for display purposes. In addition, RAW images have far greater color bit depth (range of possible colors) and image dynamic range (important for preserving highlights and shadows).
Camera Settings
-
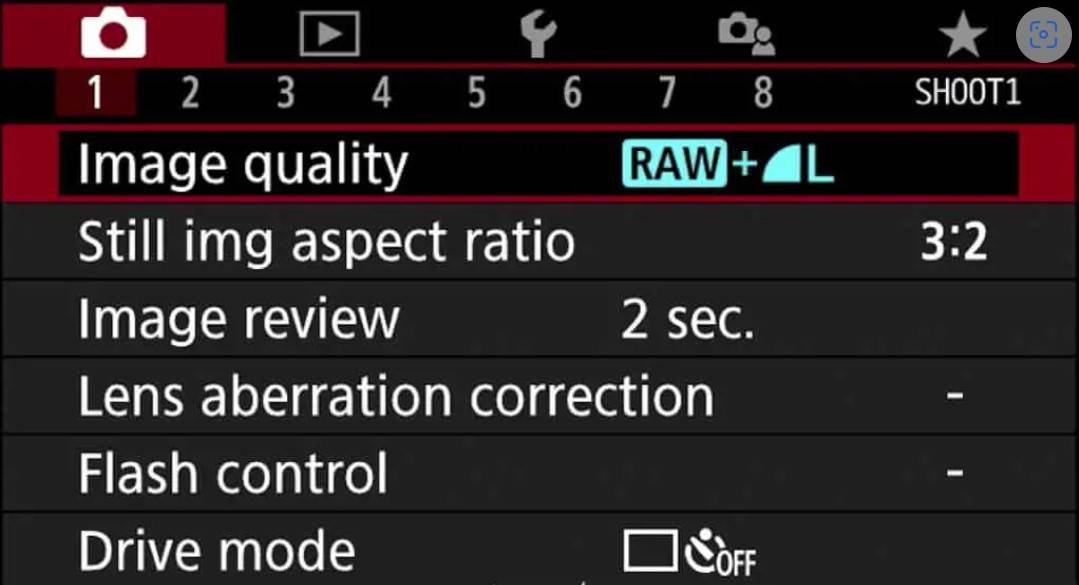
Set the image quality on the camera to RAW or RAW + JPEG (See image 1)
-
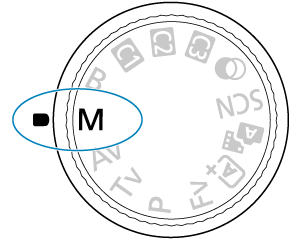
Set mode dial on the camera to Manual ‘M’ mode: (See image 2)
-
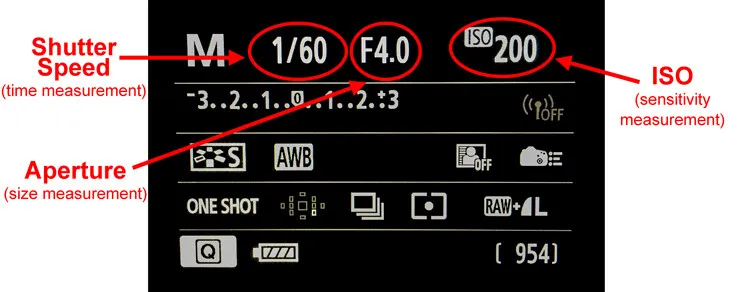
Choose an aperture value in the middle of the lens range, e.g. f-8
-
Set the ISO around 200
-
Set the shutter speed to 1/15 sec (see image 3)
-
-
Replace the white balance target with the ColorChecker in the center of the background.
-
On the camera display, enable the exposure histogram and adjust the shutter speed (Tv, “time value”) so that the data appear evenly distributed in the middle of the luminance range
-
Set the lens to MF and focus manually on the subject.
-
The camera’s focus assist function is useful for this, if available.
-
Taking photos
-
Take a series of photos varying the exposure value (EV) by adjusting the shutter speed step-wise up and down.
-
3-4 exposures on either side of what appears to be a central value on the luminance histogram should be enough (total of 7-9 images)
-
-
Open the images on your computer and find the optimal exposure for your scene:
-
On Mac you can open ‘Digital Color Meter’ and select “Display in L*a*b* from the dropdown
-
On PC, enable Color Picker utility within Power Toys and choose CIELAB as the default color format
-
With Adobe Lightroom in the ‘Develop’ module, you can right click in the histogram to show Lab color values
-
-
Point your mouse over a white square in the ColorChecker and select an image where L*, the luminance value, is between 94-97
-
If you are unable to locate an optimally exposed image, repeat the steps above, by adjusting either the LED brightness OR the ISO setting and take another exposure series
-
Once you have captured an image with L* in the range of 94-97 you should be able to use the corresponding exposure value (EV) in all future sessions using this scene
-
You should also ensure that the your scene is even illuminated by sampling the background to ensure that the L* values fall within a narrow range of 1-2 units
-
It is possible to perform flat field correction (FFC) if even lighting cannot be achieved
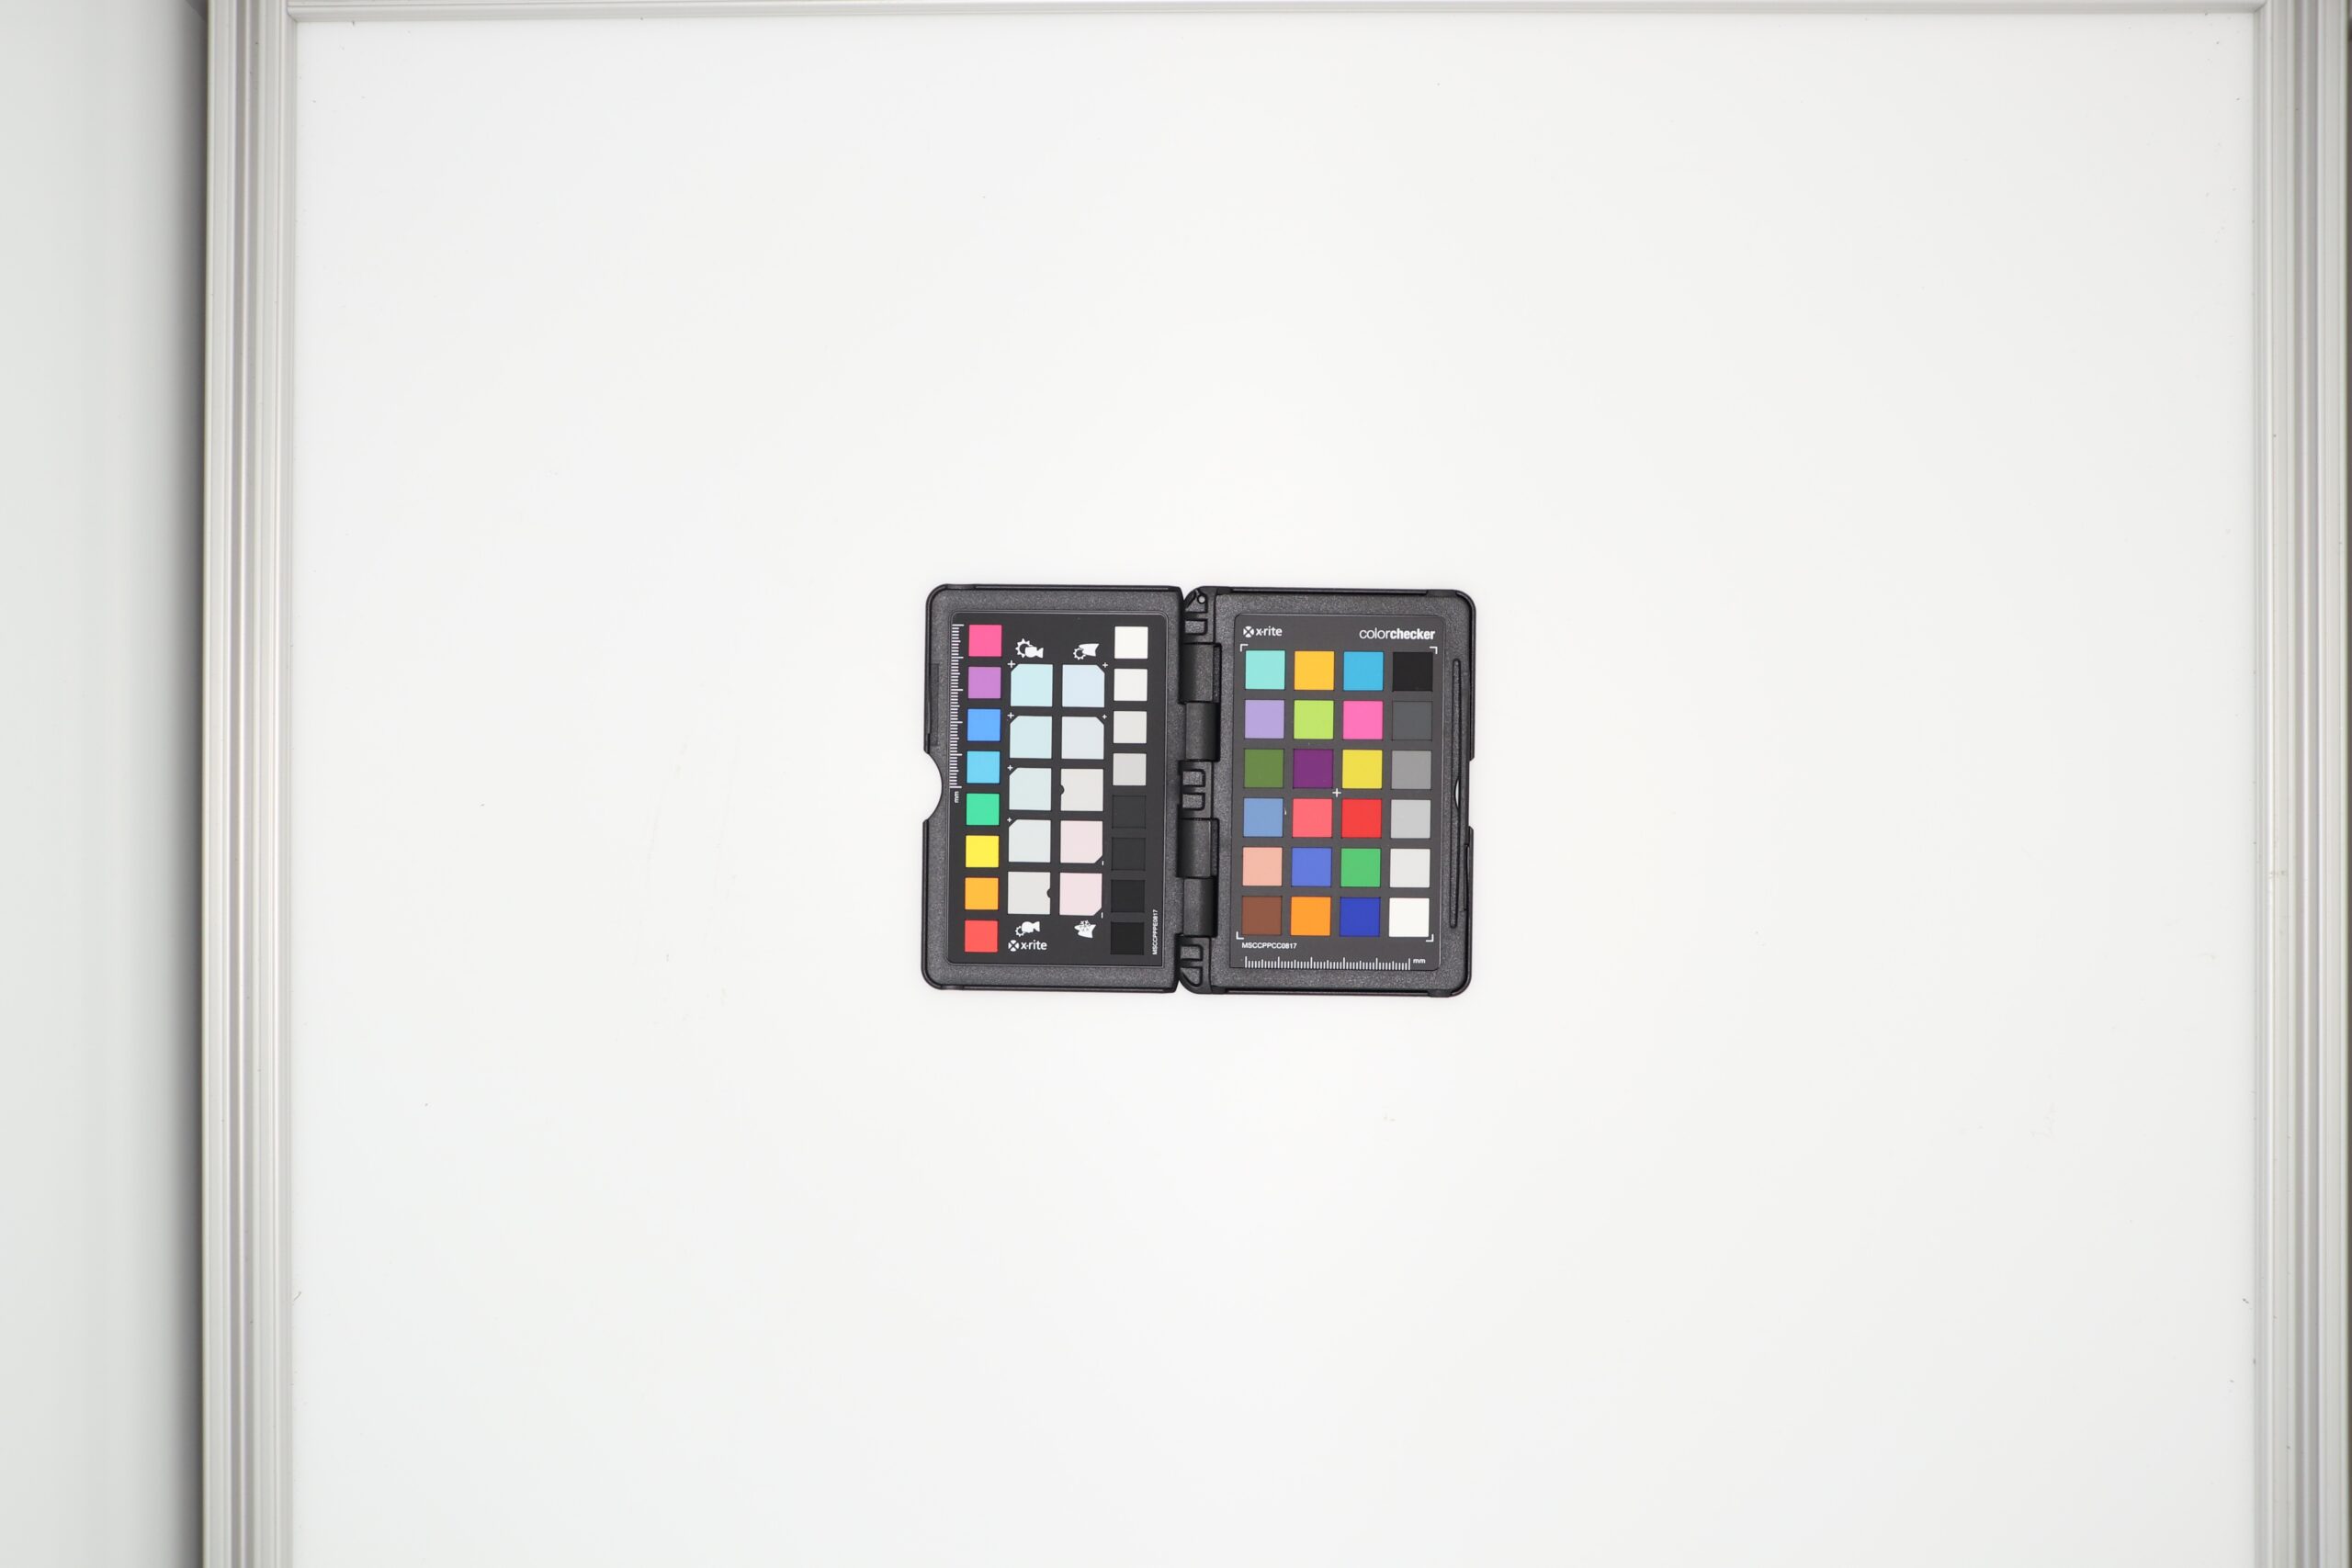
Example of correctly exposed ColorChecker against an evenly illuminated, neutral-white background. The white ColorChecker square is brightly exposed but not blown out. Sampling the background reveals that L* readings are within a range of two units. A correct white balance is indicated by low readings of a* and b* in the rightmost column of neutral squares (also indicated by nearly equal RGB values).
Although it is common to include a small color calibration target in all images, this is technically unnecessary after the correct exposure settings for the scene (combination of camera/lens, lighting, and environment) have been determined
Next Steps: Image Processing
Image Processing
We recommend following the workflow developed by The Metropolitan Museum of Art to output high-quality TIF format images for use in color analysis. We are currently experimenting with generating JPEG images that are sufficiently color-accurate for use in machine learning workflows. Note that JPEGs produced in-camera have variable amounts of sharpening, saturation, contrast, and color tone applied, depending on settings. We have had some success exporting JPEGs in Canon’s Digital Photo Professional software using “Faithful” Image Style setting from TIFs processed according to the MET protocol.
For additional assistance with image processing, reach out to Breeding Insight at bi-science-team@ufl.edu.